Exploring the Evolution of the Windows Snipping Tool
From Clipping Tool to a Modern Screenshot Utility

The Evolution of the Windows Snipping Tool: A Journey Through Time
As a Microsoft Surface and Windows MVP, I’ve had the pleasure of witnessing the evolution of many tools and features within the Windows ecosystem. One such tool that has significantly evolved over the years is the Windows Snipping Tool. Let’s take a journey through its history and highlight some of the key milestones that have shaped it into the indispensable tool it is today.
The Early Days: Clipping Tool for Windows XP
The journey of the Snipping Tool began in 2002, when it was first introduced as the Clipping Tool in the Experience Pack for Windows XP Tablet PC Edition. This early version allowed users to capture screenshots in a more flexible manner compared to the traditional Print Screen method.
Windows Vista: The Birth of the Snipping Tool
With the release of Windows Vista in 2006, the Clipping Tool was rebranded as the Snipping Tool. This version included several snipping modes such as free-form, rectangular, window, and full-screen snips. It provided users with basic editing tools like a pen, highlighter, and eraser, making it easier to annotate screenshots.
Windows 10: Introducing Snip & Sketch
In 2018, with the release of Windows 10 version 1809, Microsoft introduced a new app called Snip & Sketch. This app was designed to eventually replace the Snipping Tool, offering a more modern interface and additional features. Snip & Sketch allowed users to capture screenshots using the same snipping modes but added more robust editing tools and the ability to share screenshots directly from the app.
Windows 11: Merging Snipping Tool and Snip & Sketch
The most recent evolution came with Windows 11, where Microsoft decided to merge the Snipping Tool and Snip & Sketch into a single, unified app called the Snipping Tool. This new version combines the best features of both tools, providing a seamless experience for capturing, editing, and sharing screenshots. It includes a new design that aligns with Windows 11’s aesthetic and offers improved performance and functionality.
Introducing Video Capture Mode
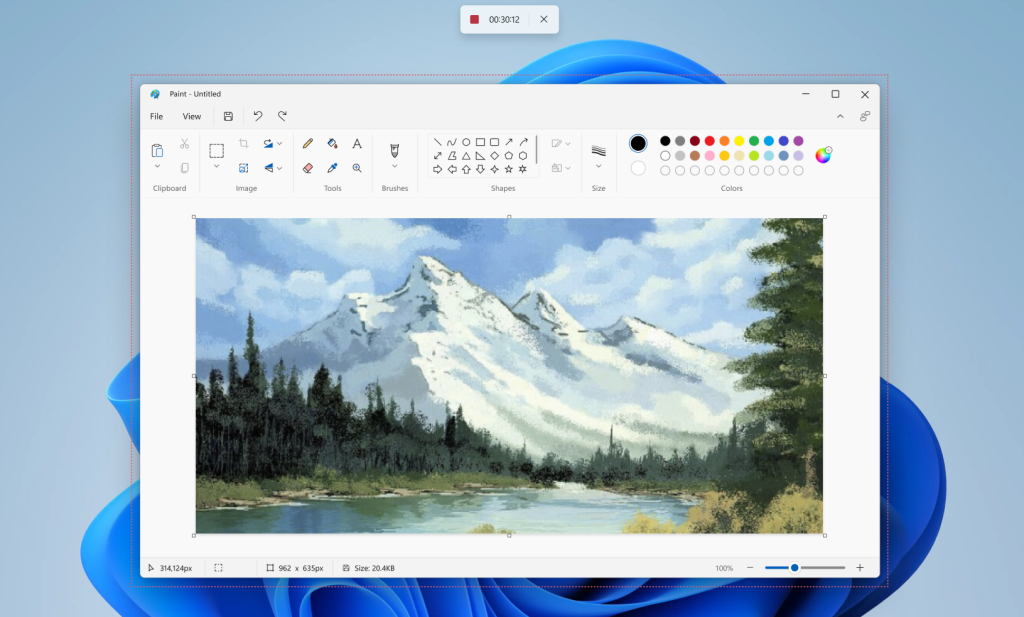
One of the most exciting additions to the Snipping Tool in Windows 11 is the video capture mode. This feature allows users to record their screen activity, making it a versatile tool for creating tutorials, recording gameplay, or capturing any on-screen activity.

As of version 11.2307.44.0, it also supports audio recording, making it even more powerful for creating comprehensive video content. Here’s how it works:
- Open the Snipping Tool: Search for the Snipping Tool in the Start menu and open it.
- Select Video Mode: Click on the Record button in the top toolbar.
- Choose the Area to Record: Drag to select the portion of the screen you want to record.
- Start Recording: Click the Start button to begin recording. A 3-second countdown will appear before the recording starts.
- Stop Recording: Click the Stop button when you’re done. The recording will be saved automatically.
While the video capture mode is a powerful addition, it currently has some limitations, such as the lack of advanced editing features. However, it provides a straightforward way to capture video content without needing third-party software.
Shapes and Text Capture
In recent updates, the Snipping Tool has also introduced the ability to add shapes to your screenshots. Users can now mark up their screenshots with rectangles, ovals, lines, and arrows. This feature is particularly useful for highlighting specific areas or adding annotations to your captures.
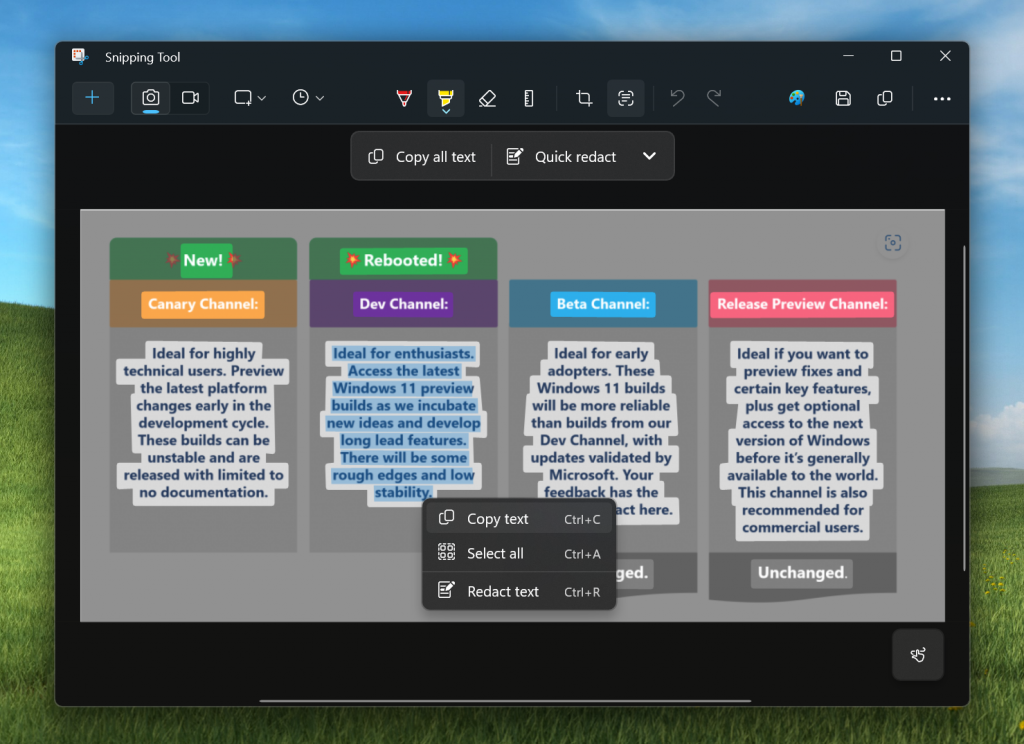
Additionally, the Snipping Tool now supports text capture. This feature allows users to extract text from images, making it easy to copy and paste text from screenshots. Furthermore, the tool can convert captured text into a table format, which is incredibly handy for organizing data or creating structured documents.
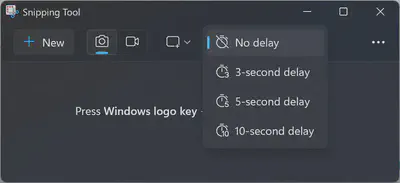
Delayed Snapshot
Another useful feature is the delayed snapshot. This allows users to set a delay before the screenshot is taken, which is particularly helpful for capturing context menus or other transient elements on the screen. Users can choose a delay of 3, 5, or 10 seconds, giving them enough time to set up the screen exactly as needed before the capture occurs.
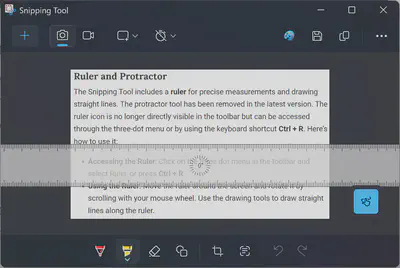
Ruler and Protractor
The Snipping Tool includes a ruler for precise measurements and drawing straight lines. The protractor tool has been removed in the latest version. The ruler icon is no longer directly visible in the toolbar but can be accessed through the three-dot menu or by using the keyboard shortcut Ctrl + R. Here’s how to use it:
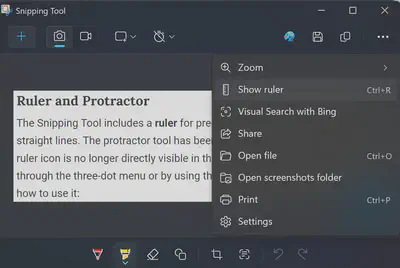
- Accessing the Ruler: Click on the three-dot menu in the toolbar and select Ruler, or press Ctrl + R.
- Using the Ruler: Move the ruler around the screen and rotate it by scrolling with your mouse wheel. Use the drawing tools to draw straight lines along the ruler.
Quick Redact in Text Actions
The Snipping Tool’s Text Actions feature includes a Quick Redact option, which is incredibly useful for quickly hiding sensitive information such as email addresses and phone numbers in your screenshots.

Here’s how to use it:
- Capture a Screenshot: Use the Snipping Tool to capture the area of the screen that contains the text you want to redact.
- Open Text Actions: Click on the Text Actions button in the toolbar.
- Quick Redact: Click on the Quick Redact button. The tool will automatically detect and redact sensitive information like email addresses and phone numbers.
- Customize Redactions: If needed, you can customize what elements are redacted by clicking the down arrow next to Quick Redact and selecting the elements you want to hide.
This feature is particularly useful for maintaining privacy when sharing screenshots that contain personal information.
Keyboard Shortcut
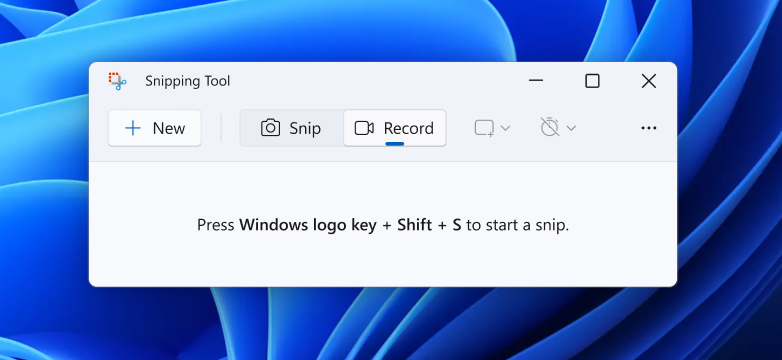
To quickly activate the Snipping Tool, you can use the keyboard shortcut Windows + Shift + S. This combination opens the snipping bar, allowing you to select the type of snip you want to perform without navigating through multiple menus. It’s a convenient way to capture screenshots efficiently.
Settings Options
The Snipping Tool also offers several settings options to customize your experience:
- Hide Instruction Text: This option hides the instructional text below the buttons in the Snipping Tool window.
- Always Copy Snips to Clipboard: Automatically copies all screenshots to the Windows clipboard, allowing you to paste them into other applications.
- Include URL Below Snips (HTML Only): When saving snips as HTML files, this option includes the URL of the webpage from which the snip was taken.
- Prompt to Save Snips Before Exiting: Prompts you to save any unsaved snips before closing the Snipping Tool.
- Show Screen Overlay When Snipping Tool is Active: Displays a screen overlay to indicate that the Snipping Tool is active.
To access these settings, open the Snipping Tool, click on the three-dot menu (ellipsis) in the top-right corner, and select Settings.
Clipboard History Integration
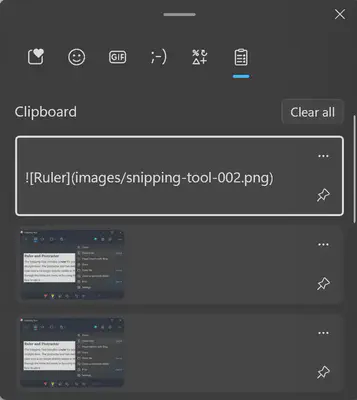
One of the features that pairs exceptionally well with the Snipping Tool is Clipboard history. Introduced in Windows 10 and enhanced in Windows 11, Clipboard history allows users to access a list of items they have recently copied, including text, images, and HTML. This feature can store up to 25 items and is incredibly useful for managing multiple screenshots and other copied content.
How to Enable Clipboard History
- Open Settings: Go to the Start menu and open Settings.
- Navigate to System: Click on System, then select Clipboard.
- Enable Clipboard History: Toggle the switch to turn on Clipboard history.
Alternatively, you can enable Clipboard history by pressing Windows + V and clicking the Turn on button.
Using Clipboard History with the Snipping Tool
Once Clipboard history is enabled, every screenshot you take with the Snipping Tool is automatically saved to the Clipboard history. You can access it by pressing Windows + V, which opens a panel showing all your recent snips and other copied items. From here, you can:
- Paste Items: Click on any item to paste it into your current application.
- Pin Items: Pin frequently used items to keep them from being overwritten.
- Delete Items: Remove items from the history to keep it organized.
Clipboard history enhances the functionality of the Snipping Tool by making it easier to manage and use multiple screenshots and other copied content.
Key Features and Enhancements
Over the years, the Snipping Tool has seen several enhancements that have made it more powerful and user-friendly:
- Multiple Snipping Modes: Users can choose from free-form, rectangular, window, and full-screen snips.
- Annotation Tools: The tool includes pens, highlighters, and erasers for annotating screenshots.
- Delay Snip: This feature allows users to set a delay before taking a screenshot, useful for capturing context menus and tooltips.
- Integration with OneNote and Clipboard: Screenshots can be easily saved to OneNote or copied to the clipboard for quick sharing.
- Improved Performance: The latest version in Windows 11 offers faster performance and a more intuitive user interface.
- Video Capture Mode: Record screen activity with ease, perfect for tutorials and demonstrations.
- Shapes: Add rectangles, ovals, lines, and arrows to your screenshots for better annotation.
- Text Capture: Extract text from images and convert it into a table format for easy organization.
- Keyboard Shortcut: Quickly activate the Snipping Tool using
Windows + Shift + S. - Settings Options: Customize your Snipping Tool experience with various settings.
- Clipboard History Integration: Manage and use multiple screenshots and copied items efficiently.
Conclusion
The Windows Snipping Tool has come a long way since its inception as the Clipping Tool in Windows XP. Its evolution reflects Microsoft’s commitment to enhancing user productivity and providing powerful tools that cater to the needs of modern users. Whether you’re a casual user or a professional, the Snipping Tool continues to be an essential part of the Windows experience.